
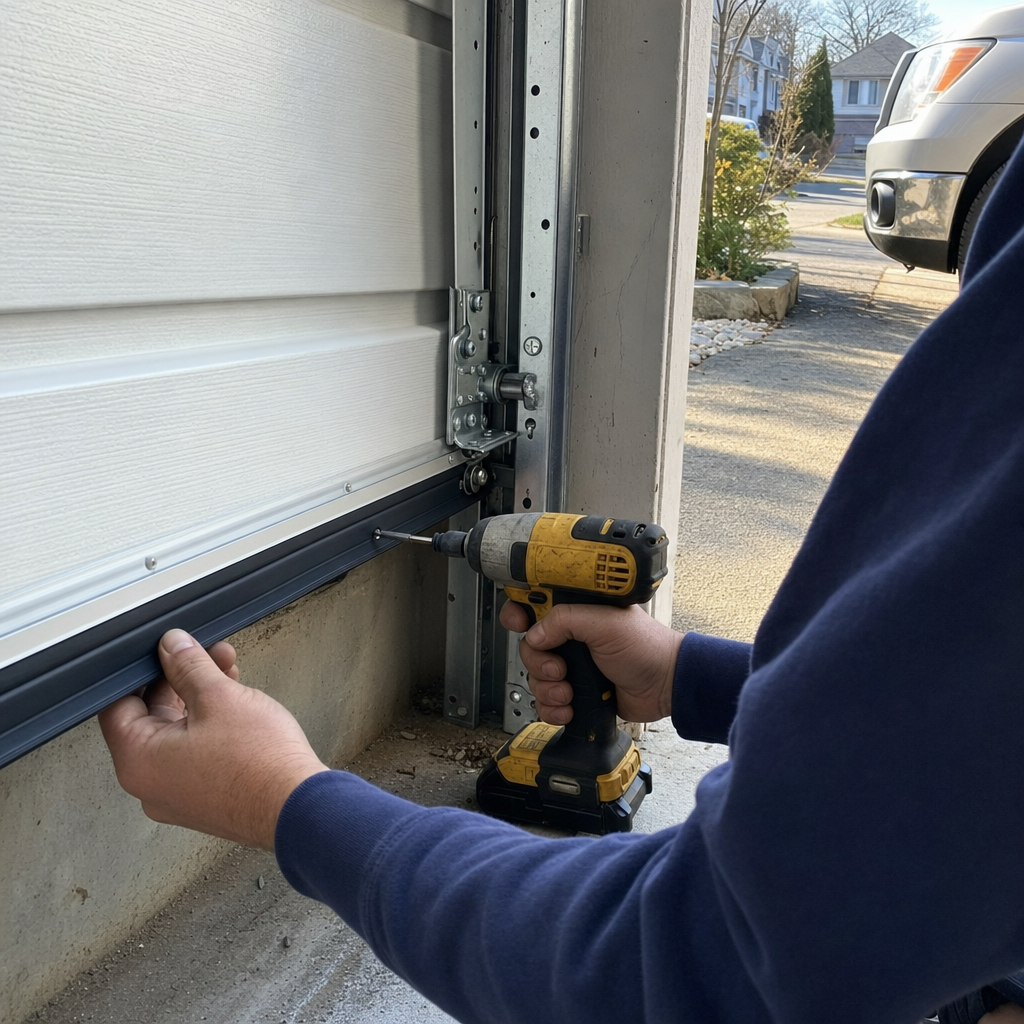
Why Your Garage Door Won’t Close in Frederick, MD — And What That Blinking Light Is Trying to Tell You
A garage door that won’t close is most often caused by misaligned or obstructed safety sensors, a travel limit switch that’s drifted out of calibration, or the opener’s safety reverse detecting excess resistance — and in Frederick’s colder months, a frozen bottom seal can mimic a sensor fault perfectly. Most homeowners can resolve sensor issues in about ten minutes with a flashlight and a damp rag; if the wall button is blinking, the opener is actively diagnosing itself, and that pattern matters. For doors that still won’t budge after basic checks, or if you see frayed cables or a crooked door in the tracks, call Legacy Garage Door Service Frederick at (888) 583-9199 for Emergency Garage Door Repair in Frederick, MD — Paul Torres handles every field call personally, and same-day service is usually available.
The Blinking Code on Your Wall Button Is a Diagnostic, Not a Decoration
That little LED on your wall-mounted control isn’t just confirming you pressed the button. When your garage door won’t close, the opener flashes a specific pattern to tell you what it detected. The problem is, every major brand uses its own code set, and the translation is buried deep in manuals most homeowners threw out years ago.
Here’s what we’ve learned from eleven years of reading these patterns in Frederick homes, from the original chain-drives in Ballenger Creek’s 2005 builds to the newer belt-drives going into Urbana infill:
- LiftMaster, Chamberlain, and Craftsman (manufactured by Chamberlain Group): One blink means a broken or disconnected safety sensor wire. Two blinks = sensor wires shorted or reversed. Four blinks = sensors are slightly misaligned or something’s blocking the beam. Five blinks = motor overheated or RPM sensor failure. Ten blinks = the safety reverse system itself has failed self-test.
- Genie (Intellicode models): A red light that stays solid while the door won’t close usually indicates the Safe-T-Beam system is interrupted. If the red LED on the receiving sensor is off entirely, there’s no power or the beam path is completely broken. Rapid blinking on the powerhead typically signals a travel limit or force-setting issue.
- Raynor (many models use Chamberlain-manufactured openers): Similar blink codes to LiftMaster/Chamberlain, though the diagnostic LED may be on the motor unit rather than the wall button. Check the rear panel for a small flashing light if your wall control doesn’t show the pattern.
We stock parts and know the firmware quirks for all eight major brands we service — LiftMaster, Chamberlain, Genie, Clopay, Amarr, Wayne Dalton, Craftsman, and Raynor — so when Paul Torres shows up, he’s not guessing which manual to pull up on his phone. He’s already worked on your exact opener model, probably in a house three streets over.
The Sensor Check Sequence That Saves Most Frederick Homeowners a Service Call
Before you assume the opener is broken, walk through this sequence. In our experience across Frederick’s suburban ring — where those 15-to-25-year-old builder-grade systems are aging out in clusters — about sixty percent of “won’t close” calls resolve right here.
Step one: Look at the LED on each safety sensor. The sending unit (usually the one with the amber or orange LED) should glow steady. The receiving unit (usually green) should also glow steady. If either is dark, flickering, or dim, you’ve found your problem.
Step two: Check alignment. The sensors sit about six inches off the floor on either side of the door, facing each other. Even a slight bump from a trash can, a bike tire, or a snow shovel can knock one askew. They don’t need to be perfect to the millimeter, but they do need to “see” each other clearly. A laser level or even a piece of string helps, but honestly, eyeballing it while watching the LED flicker works fine.
Step three: Clean the lenses. Frederick’s valley location between the Catoctin and South Mountain ridges means more wind-blown debris than the flatter DC suburbs, and pollen season here is no joke. Cobwebs, dust, and even water spots from humidity can scatter the infrared beam enough to trigger a fault. A soft cloth with glass cleaner — not your thumb smearing it around — takes thirty seconds.
Step four: Look for reflective interference. This one’s weird but real: a shiny metallic object near the sensor path — a polished toolbox, a car bumper, even a decorative mirror — can bounce the infrared beam back in a way that confuses the receiver. We saw this in a Clover Hill garage where a new stainless steel refrigerator, still wrapped in protective film, was parked temporarily near the door line.
Step five: Check the wiring. The low-voltage sensor wires run from the motor unit down to each sensor, often stapled to the wall or tucked along the track. In older Frederick homes, we’ve found rodent damage in garages backing to open space, and freeze-thaw cycles can make staple pops more common here than in milder climates. Look for obvious nicks, pinches, or disconnections at the terminal screws.
If the LEDs are solid, aligned, clean, and the wiring looks intact, but the door still reverses immediately or won’t start closing, you’ve likely moved past the sensor layer into something mechanical or a limit-switch issue.
When Frederick Winter Is the Real Culprit: Frozen Seals and Frost-Heaved Tracks
Here’s where local knowledge separates a quick fix from a frustrating goose chase. Frederick’s valley geography traps colder air than Baltimore or DC, and those sharper freeze-thaw cycles create a failure mode that looks exactly like a sensor problem but isn’t.
A rubber bottom seal that’s absorbed moisture during the day can freeze to the concrete threshold overnight. When the opener tries to pull the door down, the seal resists, the opener’s safety reverse detects excess force, and the door pops back up — often with the wall button blinking as if there’s a sensor fault. Homeowners then spend twenty minutes realigning sensors that were never the problem, which is why understanding Why Does my Garage Door Reverse? (Frederick, MD) matters.
The tell: if the door starts down, moves six to twelve inches, then reverses, and the sensors show solid LEDs, suspect the seal. Pour warm (not boiling) water along the threshold, or use a hair dryer on low to soften the contact point. Once free, inspect the seal for cracks — Frederick’s cold snaps make replacement a seasonal reality for many homes.
Similarly, frost heave in concrete aprons — more pronounced here than in flatter, warmer communities to the east — can shift vertical track slightly out of plumb. The door binds, the opener senses resistance, and you get the same reverse behavior. Look for gaps between the track and the jamb, or listen for a scraping sound during the first foot of travel. Track realignment runs $120–$240 in the Frederick market, and we carry the common bracket sizes for the builder-standard Clopay and Amarr doors found across Urbana and Ballenger Creek.
Limit Switches, Force Settings, and the “Stops Just Above the Floor” Problem
A door that descends smoothly but stops four to six inches above the concrete — or reverses sharply in that last foot — is almost always a down-travel limit issue, not a sensor issue. The opener thinks it’s reached the floor before it actually has.
This gets worse in cold weather. The internal components in the limit-switch assembly — whether mechanical screw-drive contacts or electronic position sensors — can shift slightly with temperature contraction. We’ve noticed this pattern intensifies in Frederick’s late January through February cold snaps, when overnight lows regularly dip into the teens and single digits.
Adjusting travel limits varies by brand. On most LiftMaster and Chamberlain chain-drive units, you’ll find two white plastic screws on the side or back of the motor housing: one marked “Up” and one marked “Down.” A quarter-turn of the Down screw typically moves the stop point about two inches. But — and this matters — there’s a companion force-adjustment screw that controls how much resistance the opener will tolerate before triggering safety reverse. Cranking the down limit without checking force settings can create a dangerous situation where the opener slams the door or fails to reverse on an obstruction.
We don’t recommend homeowners adjust force settings themselves. That’s the safety system that keeps a closing door from injuring a child or pet, and misadjustment is a genuine liability. If you’ve identified a limit issue but aren’t confident in the adjustment, call (888) 583-9199. Paul Torres will walk you through whether it’s safe to tweak or if the opener’s internal components are worn enough to need replacement. Opener repair runs $120–$320; full replacement, if the unit is over ten years old or has other pending failures, typically falls between $250–$550 installed.
When the Opener Is Actually Protecting You — And Forcing It Closed Would Be Dangerous
Sometimes a garage door won’t close because something genuinely unsafe is happening, and the opener’s refusal is the correct response. Knowing the difference separates a homeowner who needs a quick adjustment from one who needs immediate professional help.
Do not attempt to override or bypass the safety system if you observe any of the following:
- The door is visibly off-track — rollers popped out of the vertical or horizontal track, or the door hanging at an angle. Forcing closure can bend track, damage panels, or cause the door to fall.
- A torsion spring is broken (you’ll typically see a two-inch gap in the coil above the door) or extension springs are visibly damaged. The opener is not designed to lift a door with a failed spring, and attempting to operate it strains the motor and risks catastrophic door drop.
- Cables are frayed, unwound from the drum, or hanging loose. These are under extreme tension and can cause serious injury if they snap or slip.
- The door binds or jerks violently during travel, suggesting a structural issue with the door itself.
These are not troubleshooting scenarios. These are “call a technician now” scenarios requiring Garage Door Repair. In Frederick, where many subdivision homes were built with the same 16×7 Clopay or Wayne Dalton door models during the 2000s construction boom, we’re familiar with the specific spring wire sizes, cable lengths, and hardware kits that were spec’d for those common door weights. That means faster repairs without special-order delays.
Spring repair in the Frederick market typically runs $180–$340. Cable repair is $130–$250. Panel replacement, when a door section is damaged but the rest of the system is sound, ranges $250–$500 depending on whether the original color and panel style is still available.
What a Professional Diagnostic Actually Looks Like
When Paul Torres arrives at a “won’t close” call in Frederick, the process is methodical. He starts with the opener’s blink code, confirms sensor function with a multimeter (not just visual inspection), checks door balance by disconnecting the opener and lifting manually, inspects spring tension, examines cable condition, and runs the door through a complete travel cycle while listening for binding points.
This takes about fifteen minutes. The goal isn’t to find the fastest billable item — it’s to identify the actual root cause. In a Ballenger Creek cul-de-sac last February, we had three calls in one week where the initial symptom was “won’t close.” One was frozen seal. One was a Genie Safe-T-Beam knocked out of alignment by a basketball. The third was a torsion spring that had cracked through half its coils, and the opener’s force sensor was correctly refusing to operate a dangerously unbalanced door. Three identical symptoms, three completely different repairs.
That’s why our assessments are free. We’d rather diagnose correctly than guess over the phone and show up unprepared. If it’s not right, we’re not done.
Typical Costs for “Garage Door Won’t Close” Repairs in Frederick
Here’s what Frederick-area homeowners typically invest to get a non-closing door operational again, based on the actual repairs we perform:
| Repair Type | Price Range | When It Applies |
|---|---|---|
| Sensor realignment / wiring repair | $120–$180 | Misaligned, dirty, or disconnected sensors; minor wiring faults |
| Travel limit / force adjustment | $120–$180 | Door stops short or reverses at consistent point; opener calibration drift |
| Bottom seal replacement | $130–$220 | Cracked, torn, or frozen seal causing resistance or weather infiltration |
| Track realignment | $120–$240 | Frost heave, impact damage, or hardware loosening causing binding |
| Roller replacement | $110–$220 | Worn or seized rollers creating drag the opener interprets as obstruction |
| Cable repair | $130–$250 | Frayed, unwound, or snapped lift cables |
| Spring repair | $180–$340 | Broken torsion or extension spring; door too heavy for opener to lift safely |
| Opener repair | $120–$320 | Internal component failure: logic board, RPM sensor, gear assembly, capacitor |
| Opener installation | $250–$550 | Unit beyond repair, obsolete, or lacking modern safety features |
| Panel replacement | $250–$500 | Damaged section causing operational or cosmetic issue |
Most “won’t close” calls we see in Frederick fall in the $150–$340 range. If you’re seeing quotes significantly above that for what sounds like a simple adjustment, get a second opinion. Paul Torres has built his reputation on honest assessments — if a spring can be adjusted instead of replaced, he’ll tell you that.
FAQs
Most repairs run between $150 and $340, with sensor realignments and limit adjustments at the lower end and spring or opener repairs toward the higher end. The exact cost depends on what’s actually failing — a frozen bottom seal is a quick fix, while a broken torsion spring requires more involved work. For the Best Garage Door Repair in Frederick, MD, call (888) 583-9199 for a free, no-pressure estimate; Paul Torres will diagnose the root cause before any work begins.
This pattern almost always means the opener’s safety reverse is triggering on resistance — from a frozen bottom seal stuck to the threshold, misaligned sensors, or a travel limit set too short for current conditions. In Frederick winters, check the seal first: if it’s frozen to the concrete, the opener correctly interprets that drag as an obstruction. Warm water along the threshold usually frees it. If the seal isn’t frozen and sensors show solid LEDs, the down-travel limit likely needs adjustment.
Sensor cleaning, realignment, and freeing a frozen seal are safe homeowner tasks that resolve most “won’t close” issues. However, if you see a broken spring, frayed cable, off-track door, or if the opener makes grinding noises and fails to move the door at all, stop and call a professional — these components are under extreme tension and can cause serious injury. For everything in between, Legacy Garage Door Service Frederick offers free assessments, and Paul Torres will tell you honestly whether it’s a five-minute fix or something that needs his tools.
The blinking pattern is a diagnostic code. On LiftMaster, Chamberlain, and Craftsman openers, one blink usually means a sensor wire issue, four blinks means sensor misalignment or blockage, and ten blinks indicates a safety system failure. Genie units typically show a solid or rapidly blinking red LED on the receiving sensor or powerhead for beam interruption or limit problems. Check your specific model’s manual for the exact translation, or call (888) 583-9199 — with eleven years and nearly 300 local jobs behind us, we can usually decode it over the phone.
If you’d rather have it looked at, Legacy Garage Door Service Frederick offers a no-pressure assessment in Frederick — call (888) 583-9199. Paul Torres handles every field call personally, and same-day service is usually available for doors that won’t close.
Written by Paul Torres, Owner & Lead Technician at Legacy Garage Door Service Frederick, serving Frederick, MD.